
Are you looking for a cute and easy homemade Christmas tree ornament that you and your kids can together?
Well, look no further. Not only does this craft take about 15 minutes to make, but it's made with several items that we found at Dollar Tree. (See the links below.)
We chose to put our tiny Santa hat on a plastic toy dinosaur, but of course you can use any animal or figurine you'd like.
Know someone who loves dinosaurs? Then check out these posts:
Craft Materials Needed
- 1 sheet of red cardstock
- 1 sheet of white cardstock
- Pencil
- Scissors
- Tacky Glue (Elmer's Glue, or any other adhesive glue would work as well)
- 1 small white craft pom pom
- 1 small plastic dinosaur
- 1 mini bottle tree
- Hot glue gun and glue sticks
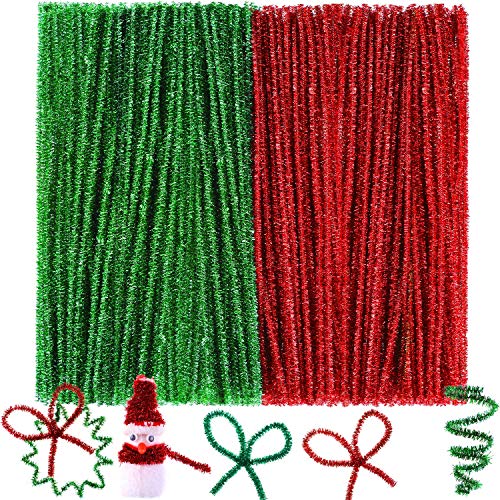
- Sparkly pipe cleaner (silver, gold, red or green)
- 4 small craft pom poms (I used red, green, and white)
- Mason Jar shaped DIY ornament
- Package of faux snow
- Red and green satin ribbon

Directions
- Place the bottle of tacky glue on the edge of the red cardstock, with half the bottle on, and half off. Trace the semi-circle shape onto the cardstock with a pencil. (You could also trace any other circular shape that is approximately 1 ½" in diameter.)

- Use scissors to cut out the red semi-circle.
- Place the red semi-circle onto the white cardstock, and trace the semi-circle again.


- Cut out the white semi-circle, and then cut another semi-circle within the white, leaving you with an approximately ¼" rainbow shape.


- Fold the red semi-circle into a cone shape, and apply tacky glue to the seam to seal.

- Apply tacky glue to the bottom border of the cone, and wrap the white rainbow shaped strip around.

- Hot glue one small white pom pom to the top of the cone to complete your Santa hat.


- Hot glue the Santa hat to the dinosaur's head.


- Next, hot glue the mini tree to the inside of the ornament lid ...

- ... and hot glue the dinosaur's feet diagonal to the tree.


- Cut a piece of pipe cleaner approximately 1 ½" long.

- Bend into a slight curve, and hot glue pom poms to the pipe cleaner in alternating colors of red, green, and white.

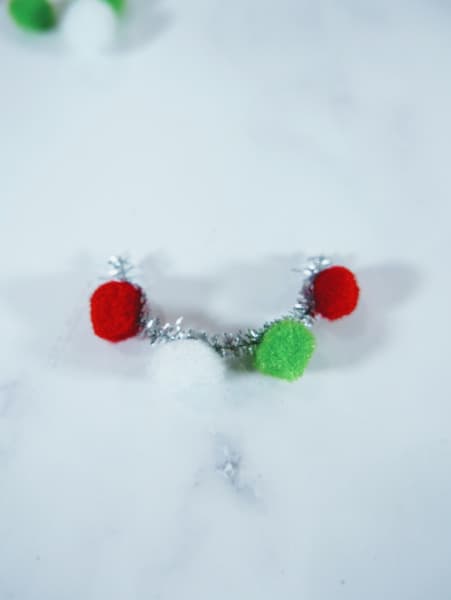
- Apply hot glue to the ends of the pipe cleaner, and attach to the inside top of the ornament. (We found it easiest to hold the pipe cleaner between my pointer and middle finger to slide into the ornament.

- Turn the ornament upside down, and pour in faux snow. Screw the lid onto the ornament.

- Cut a piece of green and red ribbon approximately 12" long.

- Thread through the ornament hook, and tie in a bow.

- Enjoy your ornament!

Dollar Tree Santa Hat Ornament
Active Time:
15 minutes
Total Time:
15 minutes
Difficulty:
Easy
Materials
- Sheet of red cardstock
- Sheet of white cardstock
- Small white pom-pom
- Small plastic dinosaur (or other animal)
- Sparkly pipe cleaner
- Four small craft pom-poms
- Mason jar-shaped DIY ornament
- Package of faux snow
- Red and green satin ribbon
Tools
- Pencil
- Scissors
- Tacky glue
- Hot glue gun and glue sticks
Instructions
- Place the bottle of tacky glue on the edge of the red cardstock, with half the bottle on, and half off. Trace the semi-circle shape onto the cardstock with a pencil.
- Use scissors to cut out the red semi-circle.
- Place the red semi-circle onto the white cardstock, and trace the semi-circle again.
- Cut out the white semi-circle, and then cut another semi-circle within the white, leaving you with an approximately ¼” rainbow shape.
- Fold the red semi-circle into a cone shape, and apply tacky glue to the seam to seal. Apply tacky glue to the bottom border of the cone, and wrap the white rainbow shaped strip around. Hot glue one small white pom pom to the top of the cone to complete your Santa hat, then glue the hat to the top of the dinosaur's head.
- Glue the mini tree to the inside of the ornament lid and hot glue the dinosaur’s feet diagonal to the tree.
- Cut a piece of pipe cleaner approximately 1 ½” long. Bend into a slight curve, and hot glue pom poms to the pipe cleaner in alternating colors of red, green, and white.
- Apply hot glue to the ends of the pipe cleaner, and attach to the inside top of the ornament.Turn the ornament upside down, and pour in faux snow. Screw the lid onto the ornament.
- Cut a piece of green and red ribbon approximately 12” long. Thread through the ornament hook, and tie in a bow.
- Enjoy your ornament!
Recommended Products
As an Amazon Associate and member of other affiliate programs, I earn from qualifying purchases.


Leave a Reply