
This snowflake sensory is both beautiful and easy to make -- plus it kind of doubles as DIY winter home decor.
So what's a sensory bottle?
If you're not familiar with sensory bottles (also known as discovery bottles or calm down jars), they're basically a bottle filled with some sort of thick, drippy liquid, plus a lot of "stuff" that swirls around in it.
Not only do they have a calming effect on people of all ages (similar to how you feel when you watch an aquarium), but you can use them to encourage skills like counting, problem solving, sorting, and visual perception.
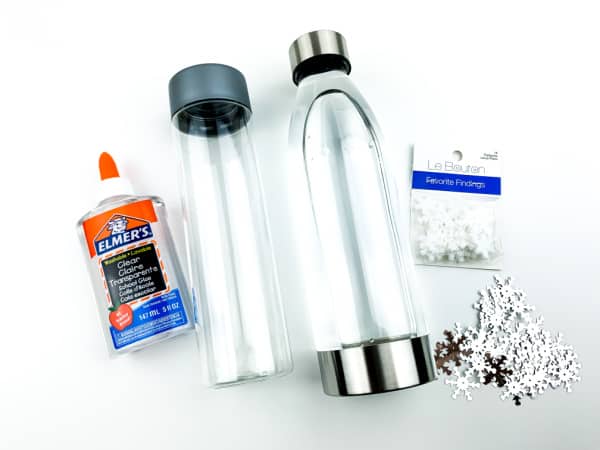
Sensory Bottle Supplies
- Empty bottle with lid -- Voss Bottles are really good for making a sensory bottle.
- 5 oz. bottle of Elmer's clear glue
- Water
- Plastic Snowflakes
- Silver confetti snowflakes
- Iridescent glitter
- Optional: tape or glue to secure the lid when finished
Sensory Bottle Directions
- Pour the glue into the sensory bottle.
- Add the snowflakes and glitter.
- Fill the remainder of the bottle with water.
- Use tape or glue to secure the lid. (You might want to wait a day or so to do this and make sure that you're happy with your snowflake-to-glue ratio first.)
- Shake the contents of the bottle around until the contents of the bottle move around slowly and freely.


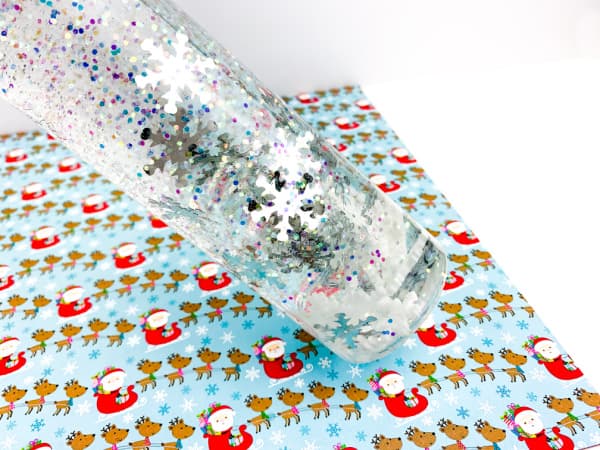
And that's it!
Want more sensory activities? Check out the posts below:
More Sensory Activities for Kids
- 12 Sensory Activities for Infants & Toddlers
- How to Make a Glow in the Dark Sensory Bottle
- 10 Easy Sensory Activities for Preschoolers


Leave a Reply