
We have a few people in my family who are crazy about cold cereal, so needless to say, we go through several jugs of milk every week.
If you're tired of having all your milk jugs become sad little smooshed things at the bottom of your recycling bin, try transforming one into a beautiful fairy house.
Not only is this fairy house pretty, but it's a homemade toy that can be used for lots of imaginative pretend play.
More Crafts & Acitivities for Kids

Fairy House Materials
Minil Hot Glue Gun with Needle Nozzle Artificial Silk FlowerInstantGreen Moss Mat, Peel n StickLime GreenPaper ShredSelf-adhesive foam craft sheets


- Empty, cleaned and dried milk or water jug
- Black fine point Sharpie marker
- Utility knife
- Self adhesive foam craft sheets in dark green, light green, brown, purple and pink
- Artificial Flower
- Hot glue gun and glue sticks
- Moss craft sheet
- Scissors
- Green paper artificial grass (or just use crumpled green tissue paper)

Fairy House Directions
- Begin by outlining a door and windows with a black Sharpie marker on your milk jug. You can make it any shape that you like.

- Use a utility knife to cut out the door and windows.
- Trace over the opening with a black Sharpie marker to even it out and give it a little more definition.

- Hold the brown adhesive foam sheet up to the handle of the milk jug to measure enough to cover the length of the handle. Then cut three pieces the length and width of the handle. (This will become your "chimney.")

- Attach the three pieces of brown foam to the milk jug's handle.

- Use the Sharpie marker to draw a brick pattern on each of the sides.

- Cut a square out of the leftover brown foam sheet, and place on top of the "chimney". Use the Sharpie marker to draw a square on the foam square. This is the top of your "chimney".

- Cut 5-6 strips out of the dark and light green adhesive foam sheets, approximately 1 ½ inches wide.

- Then cut those strips into squares approximately 1 ½ by 1 ½ inches.

- Remove the adhesive backing and begin applying the green squares around the top of the milk jug, alternating dark and light green as you go around the top.

- Make three overlapping layers that will serve as the "roof shingles" for your fairy house.

- Once all green shingles have been applied, use a hot glue gun to glue the artificial flower to the top of the jug.


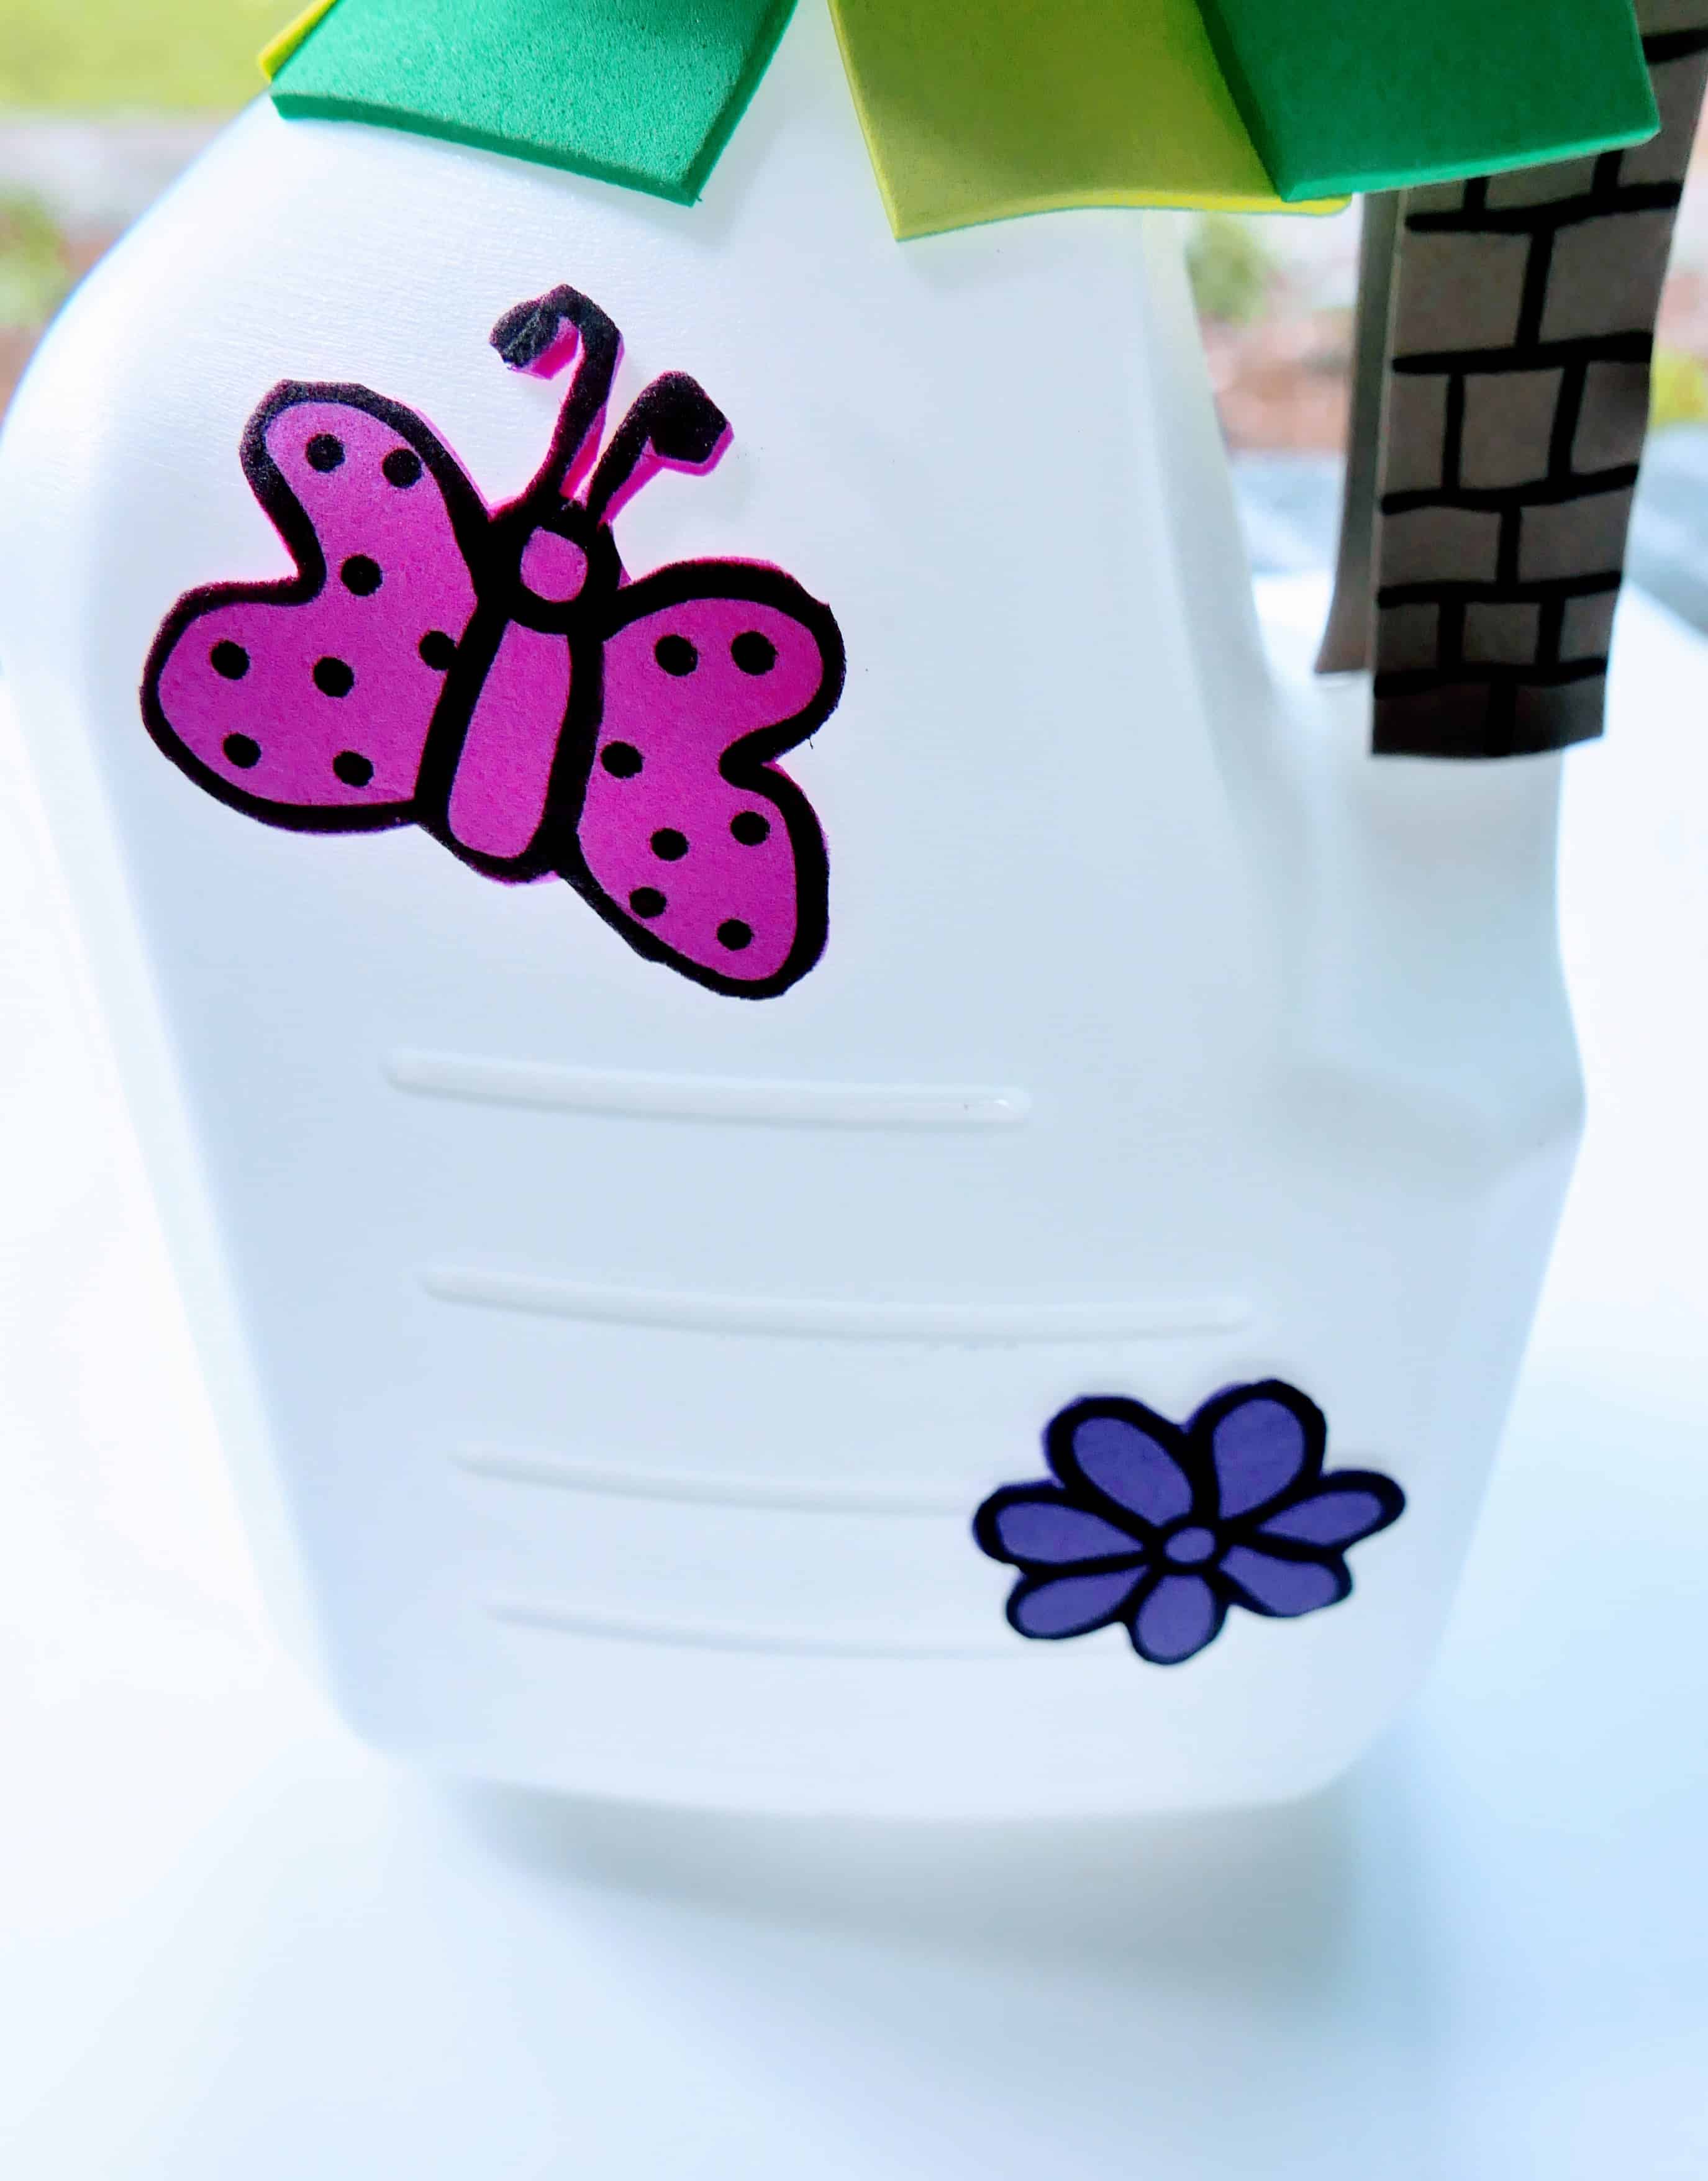
- Use the black Sharpie marker to draw some butterflies, flowers, ladybugs, or anything else you would like to decorate your fairy house.

- Use scissors to cut out your drawings, and attach to your fairy house.

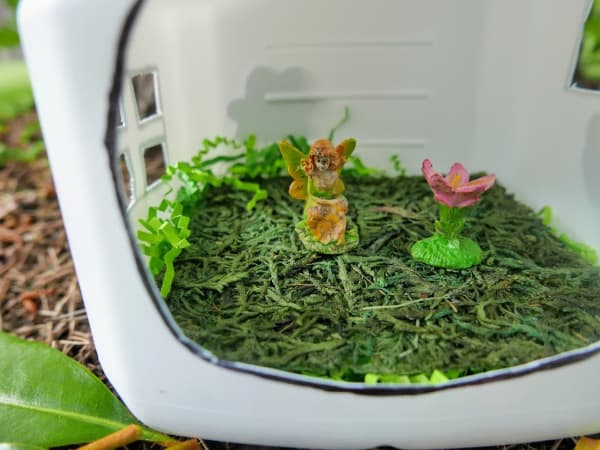
- Put a handful of green shredded paper grass inside the bottom of the milk jug.

- Cut a square out of the moss craft sheet and lay it on top of the shredded paper grass. This helps to make a flat surface to play with your fairies and garden creatures.

- Enjoy your fairy house!


How to Make a Milk Jug Fairy House
Active Time:
30 minutes
Total Time:
30 minutes
Materials
- Clean empty milk jug
- Self adhesive foam craft sheets in dark green, light green, brown, purple and pink
- Artificial flower
- Green paper artificial grass
- Moss craft sheet
Tools
- Hot glue gun and glue sticks
- Scissors
- Black Fine Point Sharpie pen
- Utility Knife
Instructions
- Use a black Sharpie marker to utline a door and windows on your milk jug.
- Use a utility knife to cut out the door and windows.
- Trace over the opening with a black Sharpie marker to even it out and give it a little more definition.
- Hold the brown adhesive foam sheet up to the handle of the milk jug to measure enough to cover the length of the handle. Then cut three pieces the length and width of the handle. (This will become your “chimney.”)
- Attach the three pieces of brown foam to the milk jug’s handle.
- Use the Sharpie marker to draw a brick pattern on each of the sides
- Cut a square out of the leftover brown foam sheet, and place on top of the “chimney”. Use the Sharpie marker to draw a square on the foam square. This is the top of your “chimney.”
- Cut 5-6 strips out of the dark and light green adhesive foam sheets, approximately 1 ½ inches wide.
- Cut the green strips into squares approximately 1 ½ by 1 ½ inches.
- Remove the adhesive backing and begin applying the green squares around the top of the milk jug, alternating dark and light green as you go around the top.
- Make three overlapping layers that will serve as the “roof shingles” for your fairy house.
- Once all green shingles have been applied, use a hot glue gun to glue the artificial flower to the top of the jug.
- Use the black Sharpie marker to draw some butterflies, flowers, ladybugs, or anything else you would like to decorate your fairy house.
- Use scissors to cut out your drawings, and attach to your fairy house.
- Put a handful of green shredded paper grass inside the bottom of the milk jug.
- Cut a square out of the moss craft sheet and lay it on top of the shredded paper grass. (This helps to make a flat surface to play with your fairies and garden creatures.)
- Enjoy your fairy house!
Recommended Products
As an Amazon Associate and member of other affiliate programs, I earn from qualifying purchases.


Leave a Reply