
Looking for a hands-on, creative project to enjoy with your kids all year? A DIY sun catcher craft is the perfect way to capture the beauty of nature through each season while giving kids a chance to play outdoors, collect natural treasures, and make something beautiful for the home. This DIY sun catcher project combines outdoor exploration, creativity, and sensory fun-perfect for curious kids and parents alike!
Why Make a DIY Sun Catcher?
This craft is simple, budget-friendly, and flexible for kids of all ages. You'll love the easy setup and minimal supplies, and your kids will enjoy collecting leaves, flowers, or other nature items. This project is a fantastic way to encourage children to observe and appreciate nature's unique beauty each season brings. And, while you're at it, if you enjoy doing DIY crafts then you'll love this DIY Gift Vault! It is full of free, family friendly DIY gift kits and printable cards you can use for every holiday and occasion!
What You'll Need:
To get started on your DIY sun catcher, gather the following supplies:
- Construction paper
- Contact paper (clear, sticky-backed sheets)
- Scissors
- Glue stick or double-sided tape
- Hole punch
- String, yarn, or ribbon
- Basket or bucket (for collecting nature items)
- Nature items
Psst… is your craft closet starting to drive you crazy? You're not alone! Keeping things organized with kids can feel like an impossible task but this guide and workbook is ahh-mazing and will teach you how to create a home that works with your existing habits instead of against them. Trust me, you need this in your life!

Step 1: Prepare Your Frames and Contact Paper
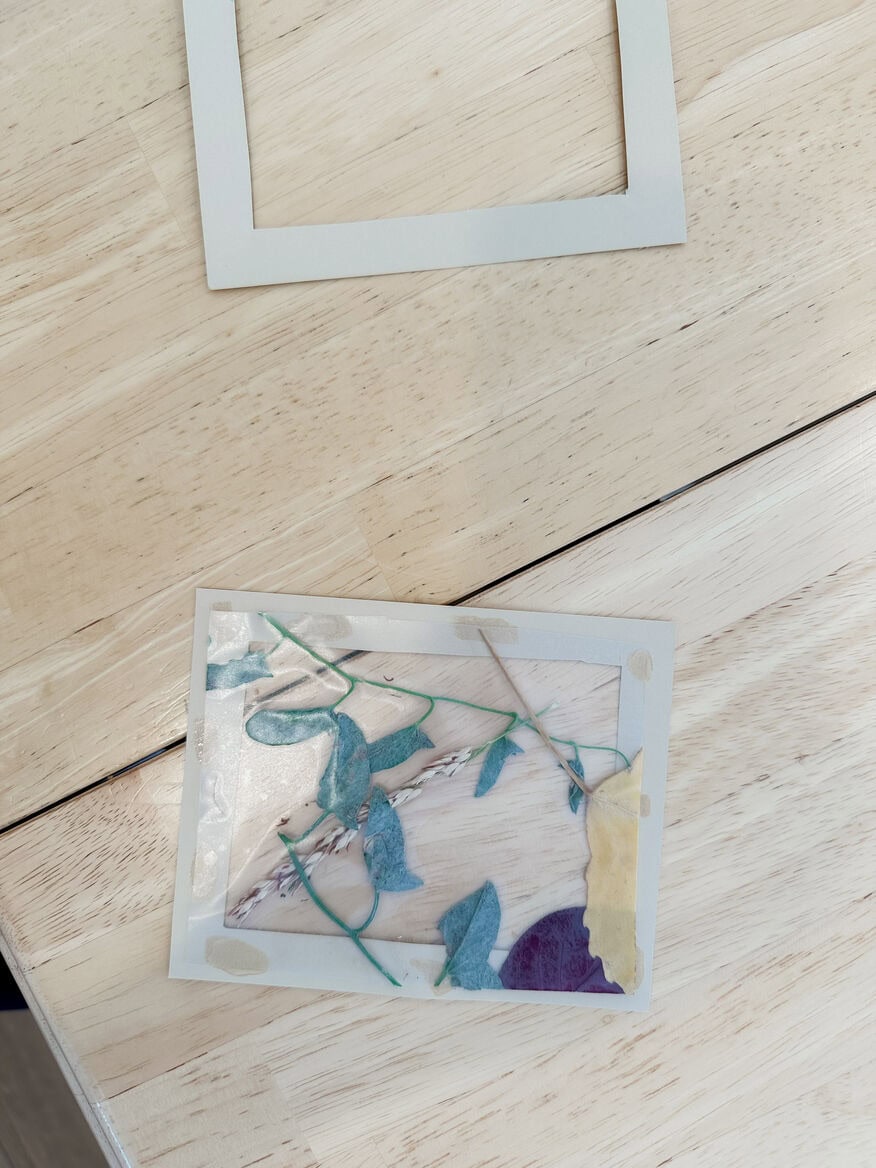
- Cut Construction Paper Frames: Begin by creating your frames out of construction paper. Cut two identical rectangles (or any shape) for each frame, then cut a smaller rectangle out of the center of each to look like a picture frame.
- Prepare Contact Paper: Cut two pieces of contact paper for each frame, slightly larger than the inner dimensions of your frame cutouts. These will act as the "glass" of your DIY sun catcher and will hold your nature items in place.
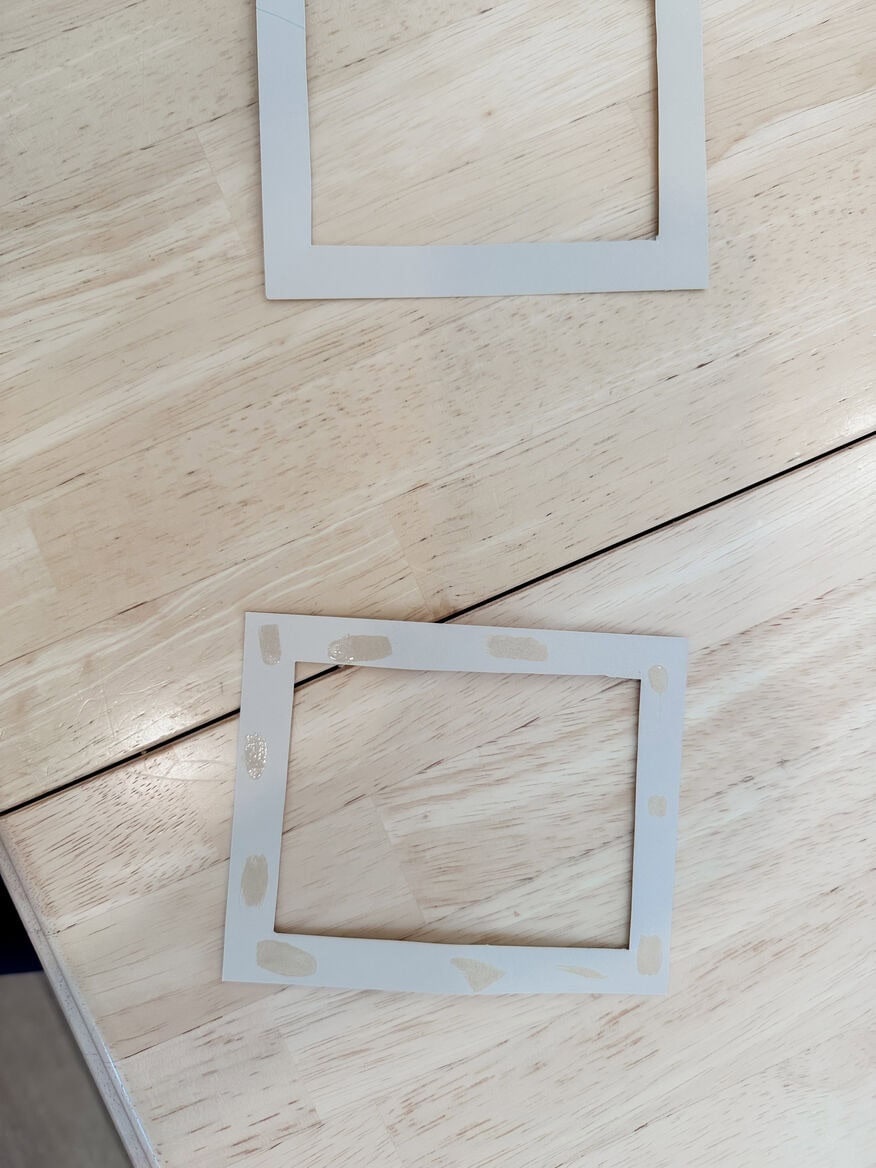
Tip: If you're working with younger kids, you can prepare the frames and contact paper ahead of time to make the assembly faster and simpler.
Step 2: Go on a Nature Hunt for Seasonal Treasures
Now it's time for the fun part! Head outside with your kids and bring along a basket or bucket for collecting. Depending on the season, they can look for:
- Spring: Fresh flowers, small budding leaves, or grasses
- Summer: Bright green leaves, flower petals, small seashells, or colorful feathers
- Fall: Autumn leaves, dried berries, pine needles, and twigs
- Winter: Evergreen branches, pinecones, or any other nature items from evergreens
Encourage your kids to notice seasonal colors and textures as they gather their treasures. They might even find some surprises, like tiny insects (if you're into that sort of thing) or interesting textures on twigs and leaves! Once your basket is filled with seasonal findings, head back inside to start assembling the sun catcher.
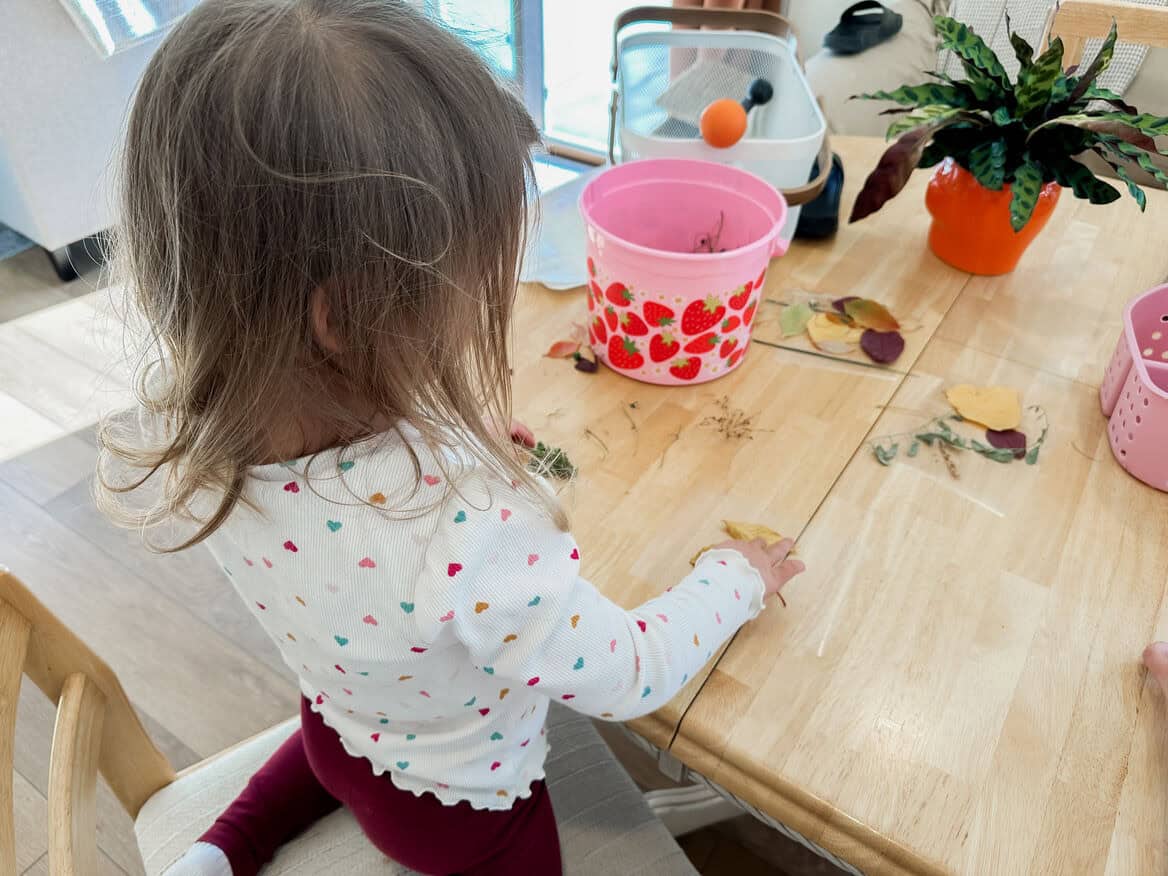
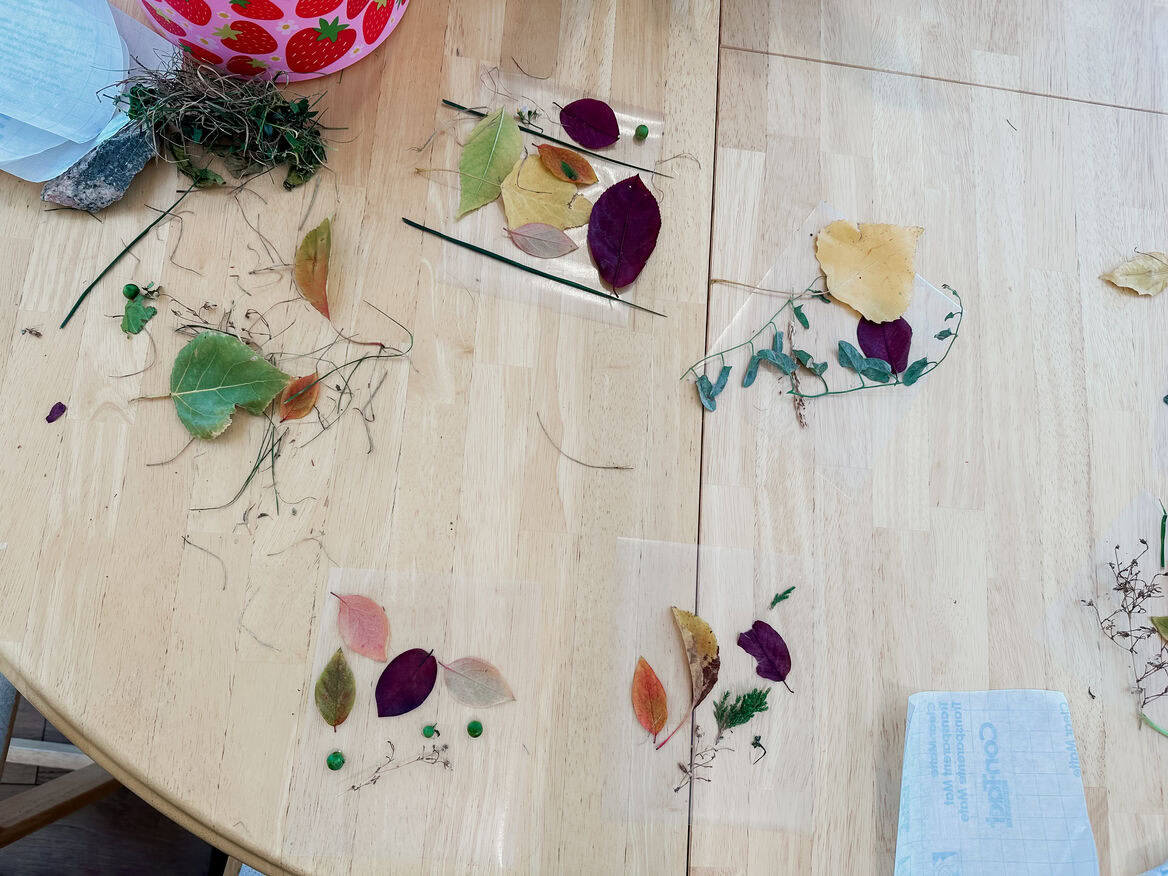
Step 3: Arrange the Nature Items
- Stick Items to Contact Paper: Lay one piece of contact paper sticky-side up on a flat surface. Have your kids start arranging their nature treasures on it. Leaves, small flowers, feathers, and other items look especially pretty when the sun shines through.
- Press Items Firmly: Remind your kids to press each item down firmly so it sticks well to the contact paper. Try to keep the arrangement relatively flat for easier assembly later. Leave a small border along the edges for better sealing.
Pro Tip: For extra sparkle, sprinkle a bit of glitter or sequins between items. Just be cautious of loose items with younger children.
Step 4: Seal with Contact Paper and Add the Frames
- Sandwich with Another Contact Paper Sheet: Carefully place the second piece of contact paper sticky-side down over the first, sandwiching the nature items in between. Press firmly to seal, smoothing out any air bubbles.
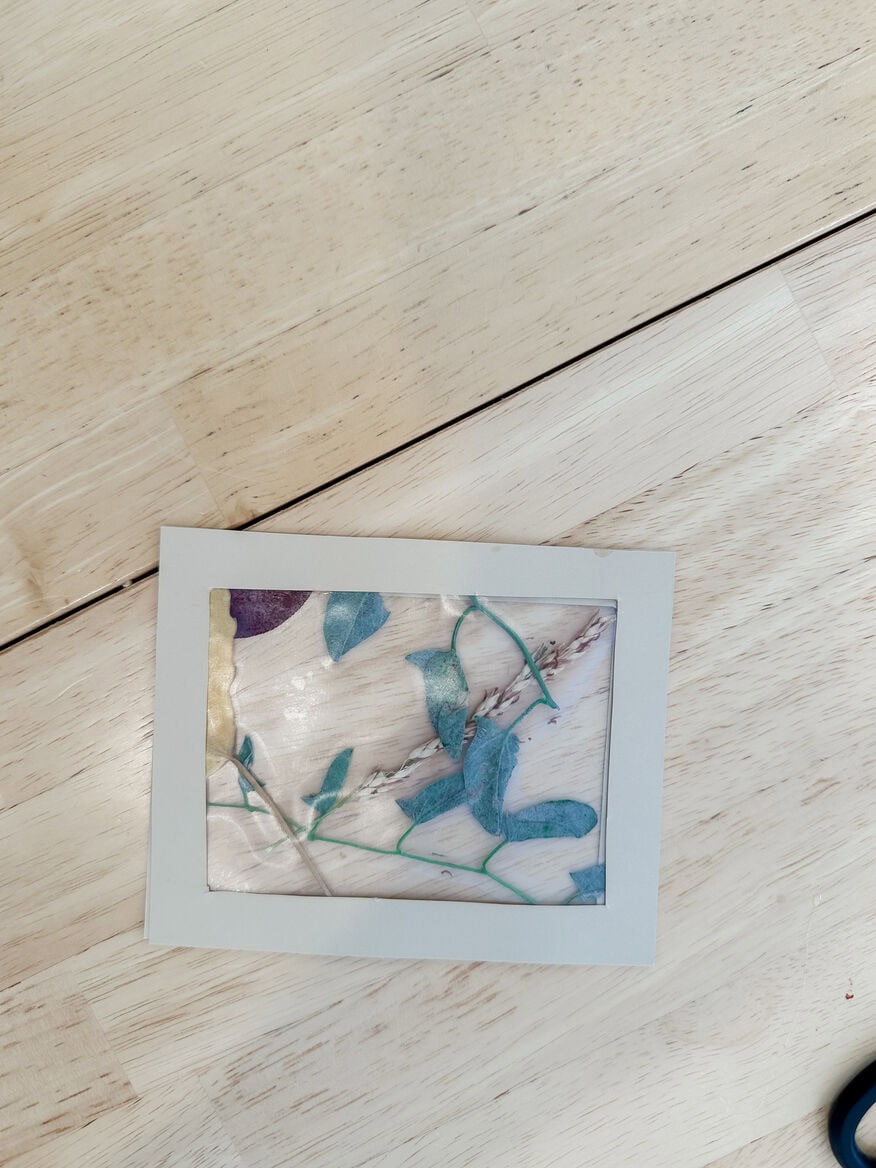
- Add Frames: Using double-sided tape or glue, attach the construction paper frames to both sides of the contact paper, creating a front and back frame for your DIY sun catcher. This step gives your sun catcher a finished, polished look.
Step 5: Punch Holes and String Together
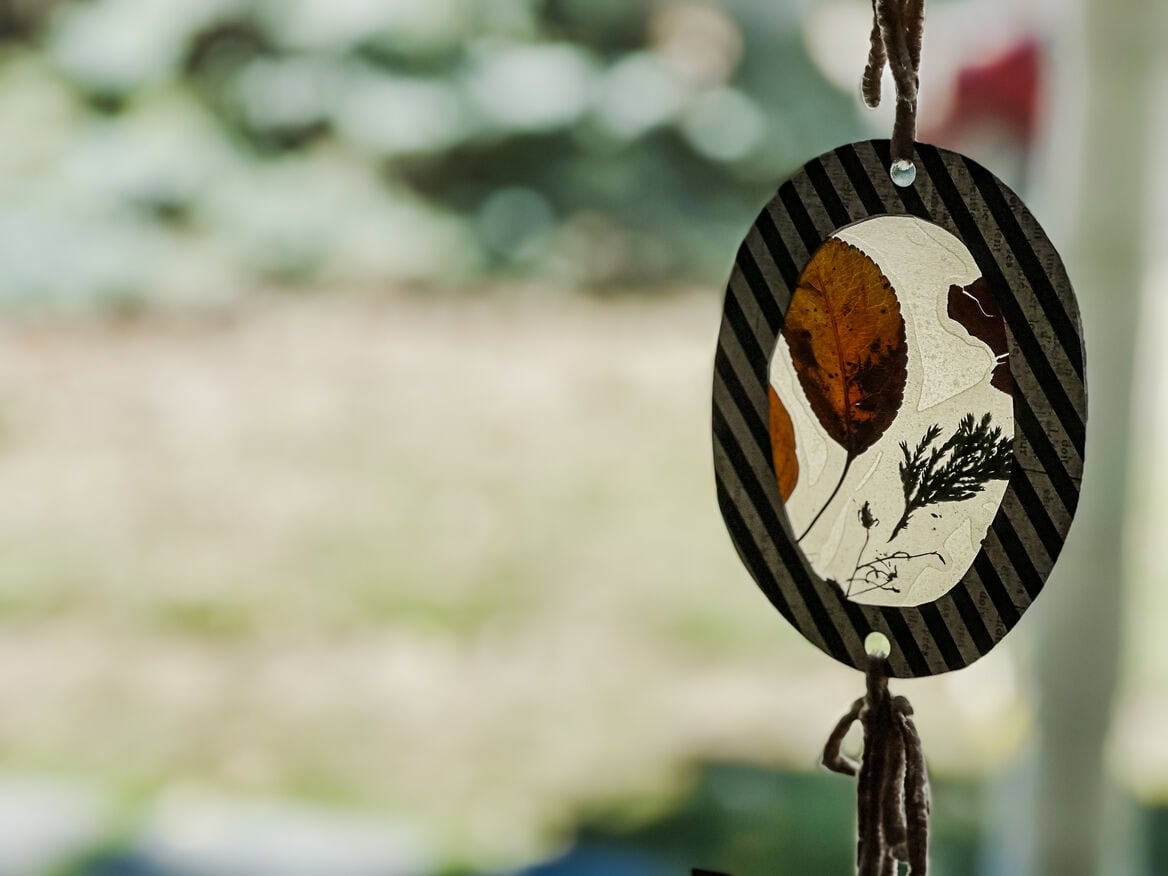
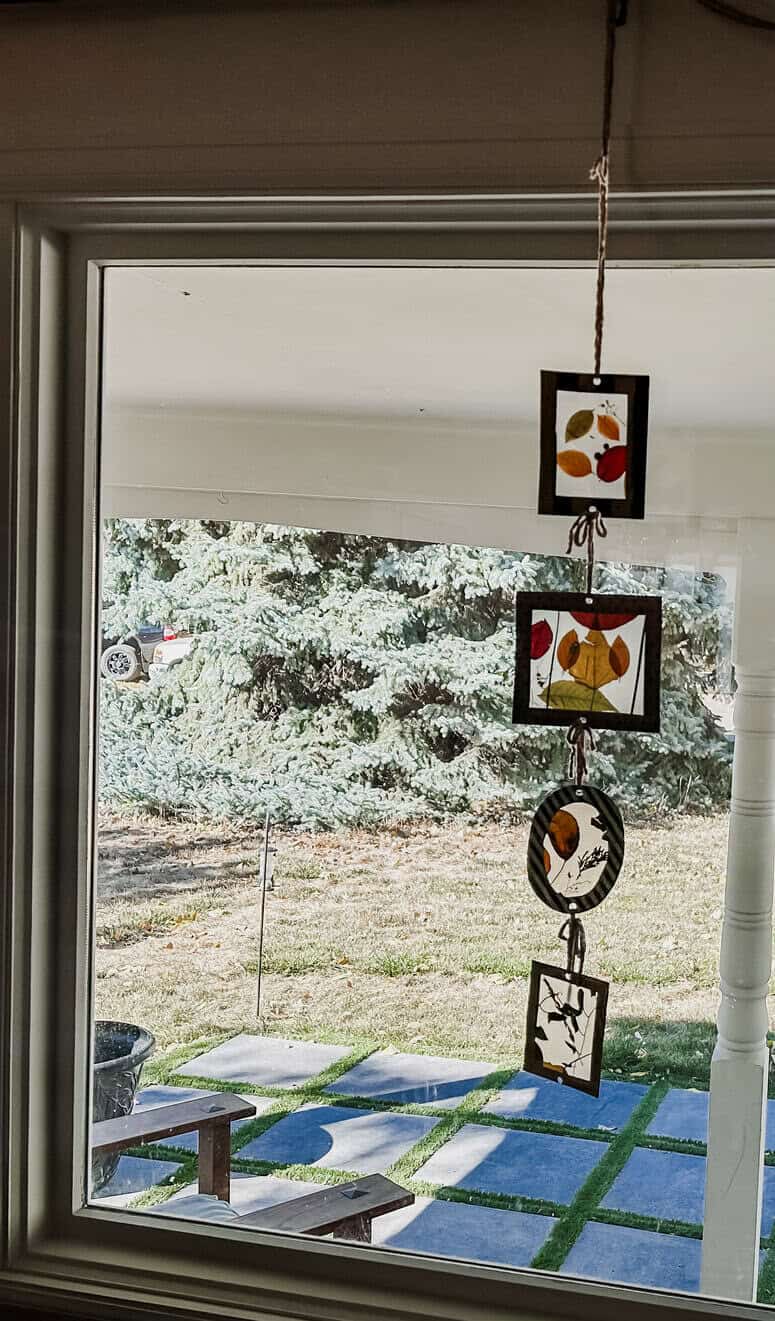
- Punch a Hole in Each Frame: Use a hole punch to make a hole at the top center of each frame. If you're creating multiple sun catchers, punch holes on the bottom as well so you can link them together like a hanging garland.
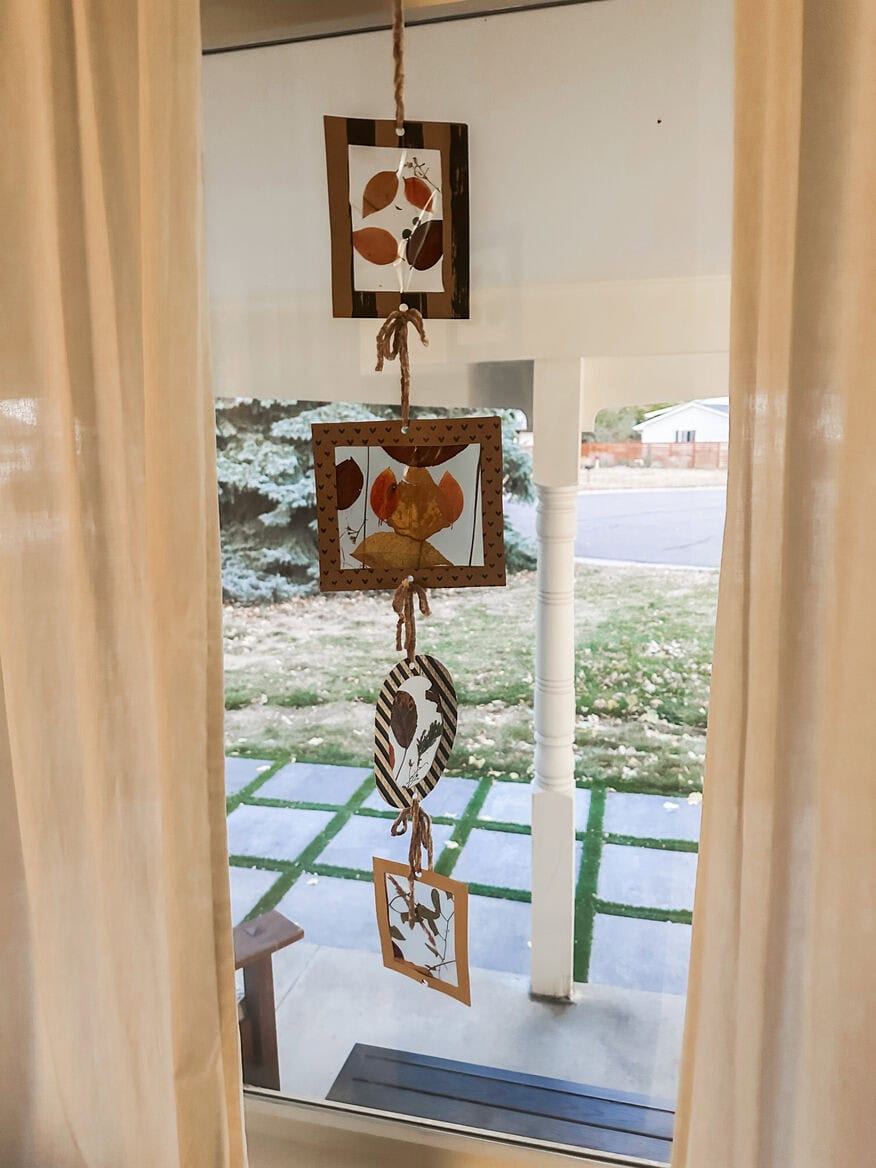
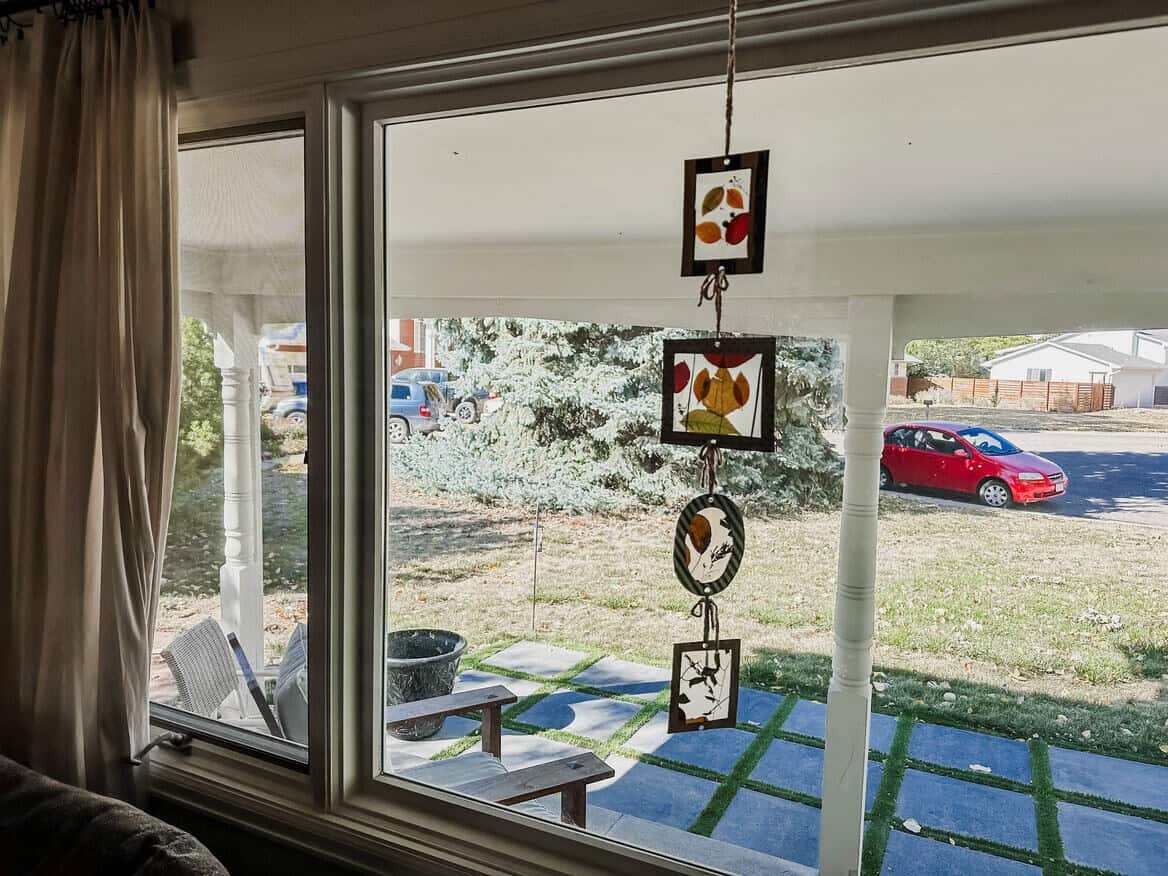
- String Frames Together: Use yarn, ribbon, or twine to string each frame together. Hang the frames in a row or in a more random arrangement for a playful look. Leave enough space between each frame so they don't overlap when they're hung in the window.
Step 6: Hang Your DIY Sun Catcher
Now that your DIY sun catcher is ready, it's time to find the perfect spot to hang it! Choose a window that gets plenty of natural light so your kids can admire the colorful, seasonal display as the sun shines through.
Whether you hang it in a single window or across a larger area, your sun catcher will bring a touch of nature indoors. Plus, your kids will feel a sense of pride each time they pass by their beautiful creation!
Helpful Tips for a Successful DIY Sun Catcher
- Encourage Creativity: Let your kids get creative! They might want to make patterns with the leaves, create faces or shapes, or layer items for a more 3D effect.
- Experiment with Frame Shapes: Try experimenting with different frame shapes-circles, hearts, or even leaf shapes can add variety and make this project even more engaging.
Benefits of Making a DIY Sun Catcher with Kids
Crafting a DIY sun catcher offers fun and plenty of learning opportunities:
- Develops Fine Motor Skills: From picking leaves to arranging items on the contact paper, this project gives little hands plenty of exercise.
- Encourages Creativity: Kids can explore colors, textures, and shapes as they design their sun catchers.
- Teaches About Seasons and Nature: This activity opens up conversations about seasons, changes in nature, and how plants grow throughout the year.
- Bonding Experience: your children love spending time with you so doing a fun and creative project together is a great way to make memories that they (and you!) will hold onto forever. And then, capture their little features in these simple and easy DIY cement pavers - another project they will love doing with you!
Final Thoughts
Making a DIY sun catcher with your kids is a rewarding project that brings nature indoors and captures each season's unique beauty. It's a fantastic way to engage kids in outdoor exploration and hands-on creativity all year. Plus, the finished product is a lasting reminder of your shared time together, sparkling in the sunlight.
So, the next time you're looking for a meaningful, simple activity, try this DIY sun catcher! Happy crafting, and enjoy bringing the beauty of nature right inside your home.


Leave a Reply